Technology Smart Home Privacy & Data Safety: Simple Settings to Protect Your Family Key Takeaways: According to a 2026 cybersecurity report from Mercury Insurance, connected homes face roughly 30 cyberattack attempts daily —... By admin | June 24, 2026 | No Comments
News Climate-Specific Efficiency: Choosing Home Upgrades Based on Your Local Weather Highlights: Your climate zone should be the first thing you identify before investing in any home efficiency upgrade — it... By admin | June 24, 2026 | No Comments
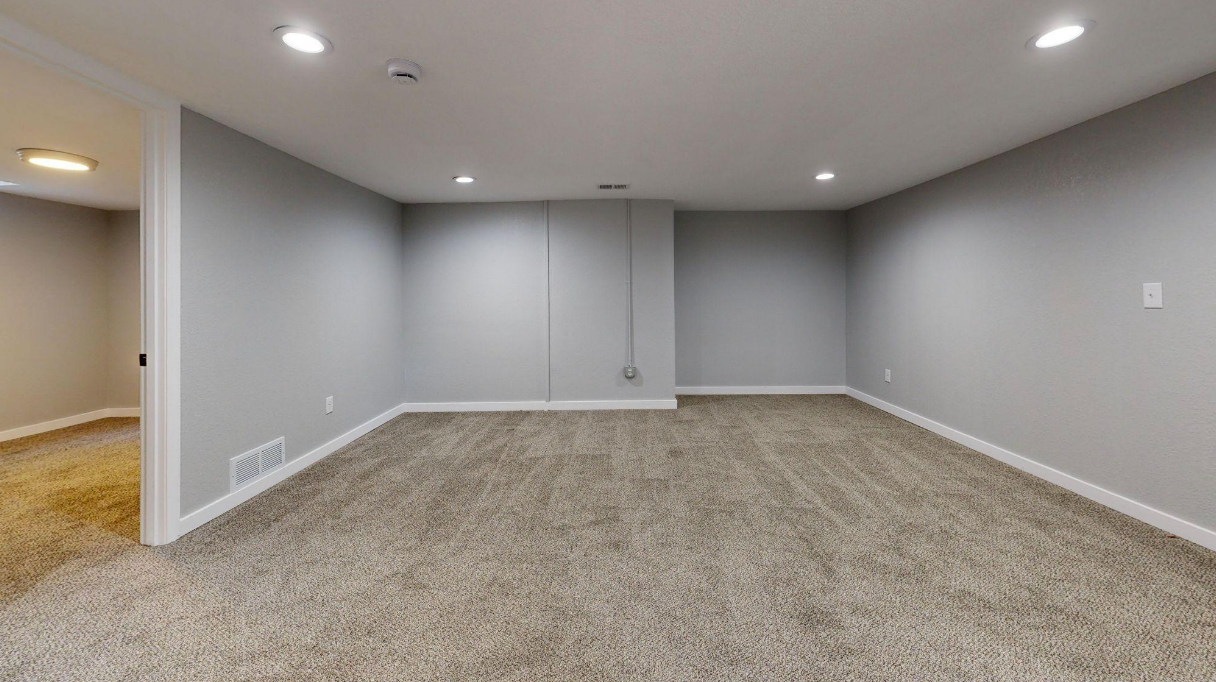
Business Why Your Basement Is Probably Costing You More Than You Think Highlights: Uninsulated basements can account for up to 30% of a home’s total heat loss — making them one of... By admin | June 24, 2026 | No Comments
Business Permits, Timeline, and Contractor Checklist for a Wellness Room Addition Key Takeaways: Wellness room additions require full building permits in every jurisdiction — skipping them risks fines, forced demolition, or... By admin | June 24, 2026 | No Comments
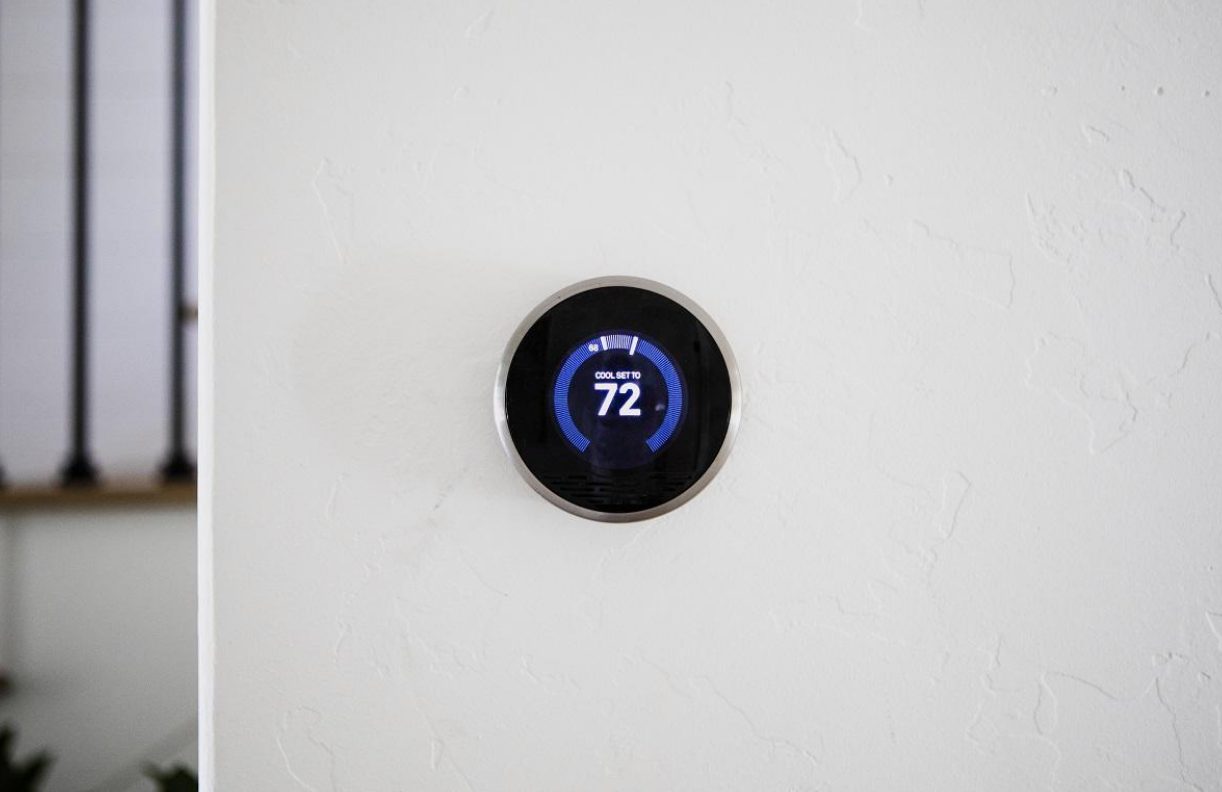
Technology Thermostat Installation Costs and ROI: DIY vs Pro, Typical Prices, and Payback Timelines Key Takeaways: Professional thermostat installation in 2026 averages $184, with a typical range of $67–$500 depending on unit type, system... By admin | June 24, 2026 | No Comments
Lifestyle Seasonal Care for Low-Maintenance Indoor Plants: Simple Routines for Year-Round Health Highlights: Overwatering is the #1 killer of houseplants, responsible for 45% of all failures — always check soil moisture before... By admin | June 24, 2026 | No Comments
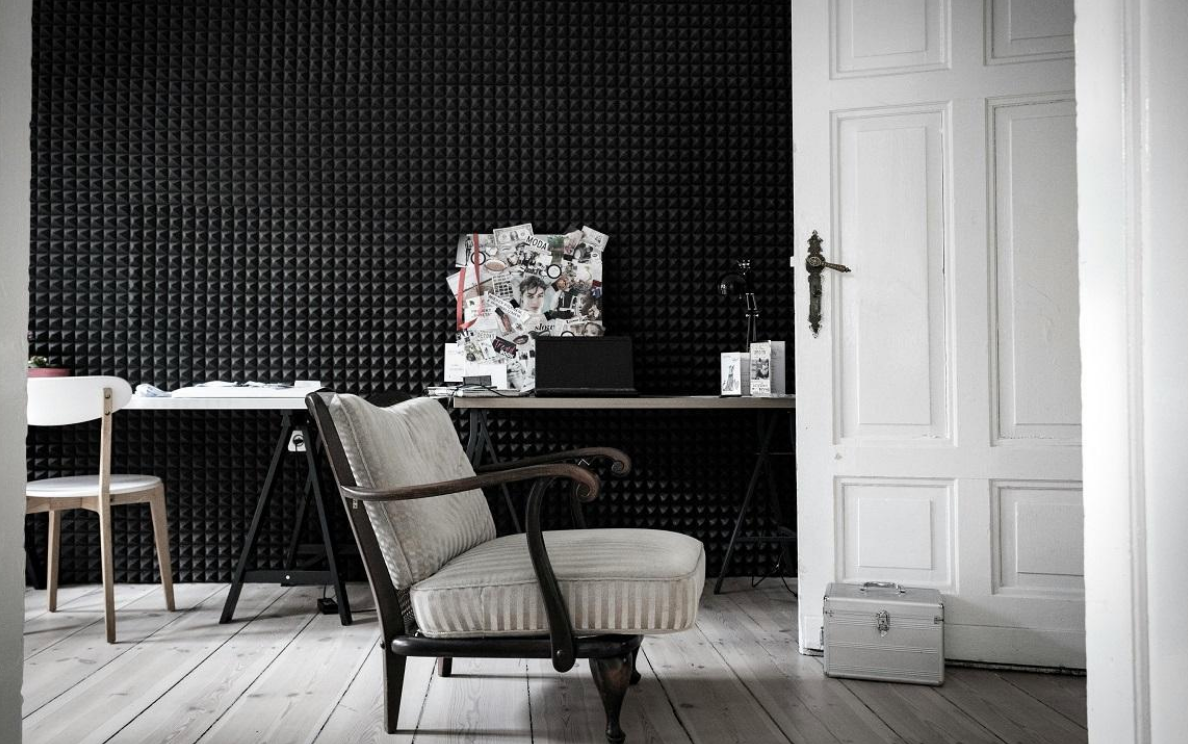
Lifestyle Room-Specific Wall Soundproofing Plans: Bedrooms, Home Offices, Apartments, and Shared Walls Highlights: Different rooms need different soundproofing strategies — a bedroom requires mass and sealing, while a home office also needs... By admin | June 24, 2026 | No Comments
Lifestyle Localization and Cultural Tuning: Using Free AI Tools to Market to Local Audiences Key Takeaways: Localization goes far beyond translation — it requires adapting tone, cultural references, imagery, and calls to action to... By admin | June 24, 2026 | No Comments
Technology Mastering Spades: Strategies for Dominating Your Opponents Key Takeaways Bidding in Spades plays a pivotal role as it forecasts performance and impacts the game’s result, prompting players... By admin | June 24, 2026 | No Comments
Lifestyle Bathroom Renovation Trends for 2026: Transform Your Space with Comfort, Sustainability, and Style Table of Contents Personalization Over Resale Value Eco-Friendly and Sustainable Designs Integration of Smart Technology Freestanding Bathtubs and Walk-In Showers... By admin | June 24, 2026 | No Comments