5 Strategies to Master Timelapse Photography Techniques

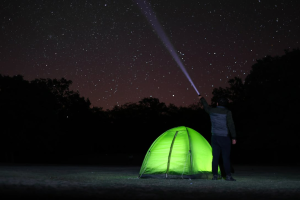
Timelapse photography is one of the most captivating ways to show time passing through a series of amazing shots. Watching stars drift across the sky or seeing a city buzz with life is pure magic. The gear keeps getting better and cheaper, so there’s never been a better time to dive in.
Let’s dive into strategies that actually up your timelapse game.
Get Your Timing Right
If you mess up your intervals, you will end up with footage that looks like a slideshow gone wrong.
Sunsets need those tight 2–5 second intervals. The light changes so fast that you’ll miss those gorgeous color shifts if you wait too long. However, street scenes are different. I usually go with 10–30 seconds there because you want to catch the flow of traffic and people, not every single step.
You don’t need fancy gear either. Intervalometers are great, but even smartphone apps work pretty well these days. You just need to experiment often.
Master Your Camera Settings (This Can’t Be Automatic)
Your camera’s auto mode will ruin a timelapse faster than you can say “flickering nightmare.”
Manual mode is your friend here. You must lock down the exposure, ISO, and white balance. I’ve watched too many potentially great sequences get destroyed by the camera trying to “help” with exposure changes.
If you want to get fancy, try HDR timelapse. It is more work, but the results are incredible because you’re capturing way more detail in both shadows and highlights. The difference between amateur and pro work often comes down to this stuff.
Add Some Movement (Motion Control Systems)
Static timelapses are fine, but moving camera timelapses are on another level entirely.
I’m talking about motorized sliders or pan-tilt heads — anything that moves your camera smoothly while shooting. Following the moon across the sky or tracking along a busy street creates a cinematic feel that grabs viewers.
The setup takes time, though. Much like American online poker, where you need strategy and patience to win, getting motion control right requires careful planning and precise execution. However, when it works, the result is pure gold.
Post-Processing Is Where Magic Happens
Raw timelapse footage straight from the camera usually looks okay, but processed footage is where you separate the pros from the hobbyists.
Adobe After Effects is the gold standard, but LRTimelapse is specifically built for this stuff. Deflickering alone will transform your work, and those tiny exposure inconsistencies that make footage look amateur will be gone.
Color grading is where you really make things pop. Don’t go crazy — subtle adjustments often work best.
Tell a Story (The Technical Stuff Doesn’t Matter Without This)
The story is what separates great timelapse from forgettable footage.
You need to figure out what you are trying to show first, then plan your shots around it. Are you showing the contrast between nature and city life, seasons changing, or a day in someone’s life?
Duration matters too. Sometimes 10 seconds says everything, while other times you might need two minutes. There’s no formula, so you just have to develop a feel for it.
Conclusion
Timelapse photography isn’t just about technical skills, although those matter. It’s about seeing time differently and showing that to others. Start with these strategies, but don’t stop there. The best timelapses come from photographers who aren’t afraid to experiment and fail a few times.
Your style will develop naturally, but you just need to keep shooting.